A fall idea
Carve a pumpkin
an evening · cozy inside · under $20 · Updated
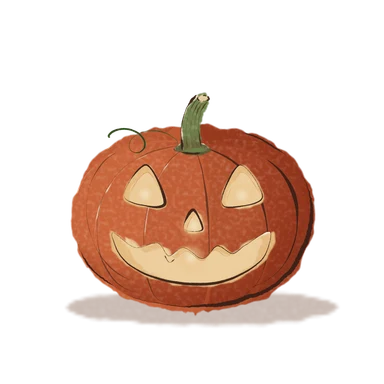
Scoop it out, draw the face on in marker first, then carve slowly with a small serrated knife, cutting away from your hands. A tea light inside with the lights off is the payoff.
- Time
- an evening
- Where
- cozy inside
- Who
- a small group
- Cost
- under $20
What you need
- A carving pumpkin
- A carving kit or small serrated knife, and a big spoon
- Newspaper for the mess, and a tea light
Carving a pumpkin takes an evening, costs under $20 and is one of the best things to do with a few friends and a table. The result is a face in the dark by the end of the night. Most of the skill is in the preparation: a good pumpkin, a thin wall, and a design you’ve drawn first.
Choose a pumpkin
Pick a carving pumpkin, not a small baking one. Look for:
- A flat bottom, so it sits steady.
- A firm, smooth skin, with no soft spots, cuts or mould.
- A sturdy, green stem. It shouldn’t be loose or shrivelled, because a stem that’s coming away is a sign the pumpkin is old.
- A shape you like. Tall, wide or bumpy ones all suit different faces.
Don’t carry it by the stem. Lift it from underneath.
Set up
Do this somewhere you don’t mind making a mess. Cover the table with newspaper or a plastic sheet, and put a bowl for the seeds and a trash bag nearby. You’ll need:
- A carving kit, or a small serrated knife
- A big spoon or scoop
- A marker or dry-erase pen
- A tea light or LED light
- A damp cloth for your hands, because pumpkin guts are slippery
Safety first
- Keep your hands dry and wipe the knife handle, because slippery tools slip.
- Cut away from your body and your hands. Don’t hold the pumpkin on your lap.
- Use small tools. Kit saws are made for pumpkins, and are much safer than a large kitchen knife.
- Go slowly. The saw does the work if you let it.
- Keep children away from knives. Let them scoop, draw and decorate instead.
- If you cut yourself, wash the cut and press on it with a clean cloth. Get medical help if it’s deep or won’t stop bleeding.
Step by step
- Cut the lid. Cut a circle around the stem, angling the knife in towards the centre, so the lid has a ledge to rest on and can’t fall inside. Make it big enough to get your hand in.
- Scoop it out. Pull the lid off and use the spoon to scrape out the seeds and stringy bits. Keep the seeds if you want to roast them later.
- Thin the wall. Scrape the inside wall of the side you’re carving until it’s about an inch thick. Thin walls are far easier to cut.
- Draw the design. Use a marker or dry-erase pen to draw the face or pattern. A dry-erase pen wipes off if you make a mistake. Keep it simple at first. Triangles for eyes and a jagged smile look great.
- Carve the small bits first. Start with the eyes and details, then the larger areas. That way the pumpkin stays firm while you work on the delicate parts.
- Saw gently. Use short, steady, back-and-forth strokes. Don’t force the blade, and don’t twist it. Cut each shape out slowly and push it gently from the inside.
- Clean up the edges. Trim rough bits and wipe away any pumpkin dust or marker lines.
- Cut a small vent hole in the back or the lid if you’re using a real flame, so the heat can escape.
Design ideas
- A classic triangle-eyed face.
- A pumpkin with only a small smile and one round eye.
- A cat, bat or ghost silhouette.
- A pattern of small holes made with a drill bit or skewer. It’s called a poked or drilled design, and it’s easy and safe.
- A word or a name.
- A pumpkin that’s painted rather than carved. See painting a pumpkin if you’d rather skip the knife.
If you want a pattern, you can print a template and tape it to the pumpkin. Poke through the lines with a pin to transfer them, and then carve along the dots.
Light it
A tea light in a small holder, set on the base, makes a warm glow. Turn off the lights, and put the lid on with the vent open. An LED tea light gives the same look without the flame, and is a better choice if there are children, pets or dry leaves nearby.
If you use a real flame:
- Keep it away from curtains, paper, dry decorations and low branches.
- Never leave it burning when no one is in the room.
- Put it somewhere sturdy, where it can’t be knocked over.
- Use a long lighter or match to reach in without burning your hand.
Make it last
A carved pumpkin won’t last forever. It usually keeps for a few days to about a week, and sooner in warm or wet weather. To help it:
- Carve it a day or two before you need it.
- Keep it somewhere cool and out of direct sun.
- Rub petroleum jelly on the cut edges to slow drying.
- Bring it indoors if it’s very warm or heavy rain is forecast.
- If it gets mouldy or soft, throw it out or compost it.
Don’t waste the seeds
Rinse the seeds, dry them, and roast them with a little oil and salt. It’s a good snack for the evening, and a way to use the whole pumpkin.
Make it a fall evening
Carve with a few friends on a weeknight, with a movie on and tea or cider on the table. Everyone draws their own design, and you swap tips. Turn off the lights at the end, light the tea lights, and line the pumpkins up on the windowsill or the porch. If you have a good one, put it with the other jack-o’-lanterns on the street.
Questions
How do you carve a pumpkin for beginners?
Cut a lid, scoop out the inside, draw your design in marker, then carve it with a small serrated knife, using slow, short cuts and always cutting away from your hands. Light it with a tea light or an LED.
How far ahead should I carve a pumpkin?
A day or two before you want to show it off. A carved pumpkin usually lasts a few days to about a week, and it rots faster in warm or wet weather.
What's the best tool for carving a pumpkin?
A small serrated knife or a carving kit saw. The little saws are thin and easy to control, and much safer than a big kitchen knife.
Is it safe to put a real candle in a pumpkin?
It can be, but a real flame is a fire risk. Use a tea light in a holder, keep it away from anything flammable, and never leave it unattended. An LED light avoids the risk.
How do I make a carved pumpkin last longer?
Keep it somewhere cool and out of direct sun, and rub petroleum jelly on the cut edges to slow drying. Bring it inside if it's very warm or heavy rain is forecast.
Did it? Keep a stamp for it.In the Seasons app, you mark an idea done and it lands in your fall passport. Seasons opens on mobile in November.
Join the waitlist