A winter idea
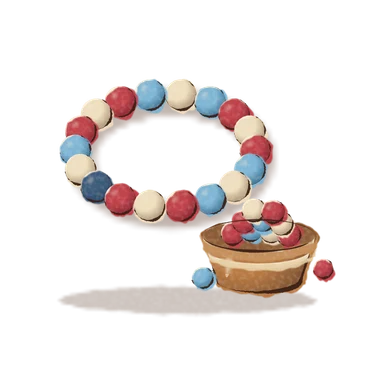
Make beaded jewelry
an evening · cozy inside · under $20 · Updated
Lay out a bracelet or necklace on a towel before you string it, so you can move beads around. Make two and give one away.
- Time
- an evening
- Where
- cozy inside
- Who
- solo-friendly
- Cost
- under $20
What you need
- Beads
- Stretch cord or wire with clasps
- A towel or tray to work on
Learning how to make beaded bracelets is about as gentle as a craft gets. You need very few things, there’s no way to make a permanent mistake until the final knot, and at the end you have something you can wear or give away. Winter evenings suit it: a lamp, a towel on the table and a small pile of colours.
Before you start
Choose a flat table with good light and, if you can, a pale surface so the colours show. Beads roll, so work on a towel or a tray with a rim, which stops them from bouncing across the floor. Keep small beads away from pets and small children, since they can be swallowed.
If you’re buying beads, a mixed pack is a good first purchase. It usually costs less than buying lots of single colours and gives you things to try. Choose beads with holes big enough for your cord. Stretch cord comes in different thicknesses, and thicker cord is easier to handle but needs bigger holes.
What to bring beyond the basics
- Scissors. Small ones are best for cutting cord close to the knot.
- Clear glue, or clear nail polish, for the knot.
- A bead needle, or a piece of tape wrapped round the end of the cord.
- A ruler or string for measuring your wrist.
- Small bowls or a muffin tin for sorting beads by colour.
Step by step
- Measure your wrist. Wrap a piece of string around it, mark the spot, and measure the string. That’s your bracelet’s length, plus a little extra for the knot.
- Lay out the pattern. Put the beads in a line on the towel in the order you want. Move them about until you like it. Try three or four colours at most, and repeat a pattern every so often.
- Cut the cord. Cut about 10 cm (4 inches) longer than your bracelet, so there’s room to tie.
- Stop the end. Tape the cord’s end to the table, or tie a loose knot, so beads can’t slide off.
- String the beads in order. A bead needle or a stiff cord tip helps.
- Check the fit. Hold it round your wrist before you tie. It should slide over your hand easily but not hang loose.
- Tie it. Bring the ends together and tie a surgeon’s knot: cross the ends, wrap one round the other twice, pull tight, then tie a simple knot over it. Pull it firmly.
- Add a dab of glue to the knot, let it dry, and trim the ends.
You can also tuck the knot inside a larger bead with a wide hole, which hides it.
Ideas for the second bracelet
Making two is the point: one for you and one to give away. For the second, try a different feel. Use one colour with a single contrasting bead, or beads of a similar colour in different sizes, or letters for a name or a word. If you want a necklace, use the same steps with wire or non-stretch cord and a clasp. That version takes longer, and it helps to ask at the shop which cord suits the beads you chose.
What goes wrong
- The cord is hard to thread. Cut the tip at an angle, or use tape or a needle.
- It’s too tight. Cut it open, restring and add a bead or two. Everything can be reused.
- It’s too loose. Remove a bead, or make a new one with a shorter cord.
- The knot slips. Pull each knot firmly, use the surgeon’s knot, and let the glue dry before wearing.
- Beads keep rolling off. Work on a towel, and keep your finger on the end of the cord.
- The beads don’t fit the cord. Check hole size before you buy more.
Keeping and giving
Take off bracelets before showering, swimming or sleeping, because water and pulling wear out stretch cord. Store them flat in a small box. If you give one away, wrap it in a bit of paper, and tell your friend to keep it away from water. If one breaks, cut off the old cord and restring the beads.
Make it a winter evening
Put on a winter playlist, lay the beads out under a lamp and make one slowly. It’s a small, quiet way to spend a dark evening, and you finish with something you can wear tomorrow.
Questions
What do I need to make a beaded bracelet?
Beads, stretch cord, scissors and something flat to work on, like a towel or tray. A bead needle or a small piece of tape on the cord end makes stringing easier.
What size should a beaded bracelet be?
Wrap a piece of string around your wrist, mark where it meets, and measure it. Add a little extra so the bracelet isn't tight. A stretch bracelet needs to slide over your hand, so also check it fits there.
How do I stop a beaded bracelet from coming apart?
Use stretch cord made for jewellery, tie a surgeon's knot, pull it tight and add a tiny dab of clear glue. Let the glue dry fully before wearing it.
How long does it take to make a beaded bracelet?
A simple one takes about 20 to 30 minutes once the beads are laid out. Planning the colours is the slow, enjoyable part, so an evening is enough for two.
Did it? Keep a stamp for it.In the Seasons app, you mark an idea done and it lands in your winter passport. Seasons opens on mobile in November.
Join the waitlist