A fall idea
Make clay pumpkins
an evening · cozy inside · under $20 · Updated
Roll air-dry clay into balls, press in the ridges with a toothpick and add a little stem. Leave them white or paint them once they're dry.
- Time
- an evening
- Where
- cozy inside
- Who
- solo-friendly
- Cost
- under $20
What you need
- Air-dry clay
- A toothpick or butter knife for the ridges
- Paint, if you want colour
Clay pumpkins are one of the easiest things to make with your hands, and they sit on a shelf all season. Air dry clay pumpkins need no kiln and no oven, so an evening with a podcast on is all it takes. Making a few in different sizes looks better than one perfect one.
Getting ready
Cover your table with parchment paper, a cutting mat or a plastic bag, because clay sticks to wood. Keep a small bowl of water nearby and a towel for your hands.
You’ll need:
- Air-dry clay, in white or terracotta
- A toothpick, butter knife or the back of a spoon for the ridges
- Acrylic paint and a small brush, if you want colour
- A clear sealer or varnish, if you want a shiny finish
White clay is the easiest to paint. Terracotta already looks like a pumpkin, so you can leave it unpainted.
Step by step
- Break off a piece of clay and knead it for a minute until it’s soft and smooth. The size of a golf ball makes a small pumpkin, and a lime-sized piece makes a medium one.
- Roll it between your palms into a ball, then press it gently on the table so the bottom flattens and it sits without rolling.
- Use a toothpick or the back of a butter knife to press a line from the top to the bottom. Turn the pumpkin and add more lines around it, evenly spaced. Six to eight is plenty.
- Make a small dip in the middle of the top with your finger or the end of a paintbrush. This is where the stem goes.
- Roll a small piece of clay into a short tube for the stem. Twist it slightly, press it into the dip, and smooth the join with a dampened fingertip. A real pumpkin stem is thick and a little uneven, so don’t aim for perfect.
- Add a curly vine if you like: roll a very thin snake of clay and wind it round a toothpick. Slide it off and press it onto the stem.
- Smooth any cracks or fingerprints with a bit of water on your fingertip.
Drying
Leave your pumpkins somewhere dry, out of direct sun and away from heaters. Drying too fast is what makes clay crack. Most air-dry clay is dry to the touch in about a day, but thicker ones need longer, often two to three days. Check your packet for its own drying time. Turn them over once during drying so the bottoms get air.
If you’re using oven-bake polymer clay instead, follow the temperature and time on the packet exactly, and never go above it. It doesn’t need to dry, but you can’t paint it as easily as air-dry clay.
Painting
You can leave them white for a quiet, Scandinavian look, or paint them. A few ideas:
- Classic orange. Use two or three shades, so the pumpkins don’t all match.
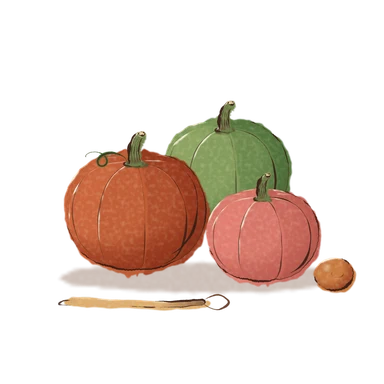
- Mix of colours. Dusty pink, cream, sage and deep brown look good together.
- Wash and wipe. Paint the whole pumpkin a light colour. When it’s dry, brush a darker colour into the ridges and wipe the raised parts with a damp cloth, so the lines stand out.
- Stems. Paint them brown or green, or leave them natural.
Let each coat dry before adding the next. If you want a finish that wipes clean, brush on a clear sealer once the paint is dry, following the instructions on the bottle.
Things that go wrong
- Cracks while shaping. The clay is too dry. Dampen your fingers, not the clay itself, and work it in again.
- Cracks while drying. It dried too fast. Fill them with a little fresh clay and water, smooth, and dry them more slowly next time.
- The stem falls off. Scratch a few marks into both surfaces and add a dab of water before pressing them together. If it falls off after drying, glue it back on.
- Flat or lumpy pumpkins. Use less water and handle them less. Roll the ball again between your palms until it’s smooth.
What to do with them
A few small ones in a bowl, a row on a windowsill, or one at each place at a dinner table. They’re also good as gifts, tied with a bit of twine. Remember that they’re for decoration only. Don’t put food on them or use them as bowls, even if you’ve sealed them.
Keep them dry. Air-dry clay softens if it gets wet, so don’t leave them outside or on a damp windowsill.
Make it a fall evening
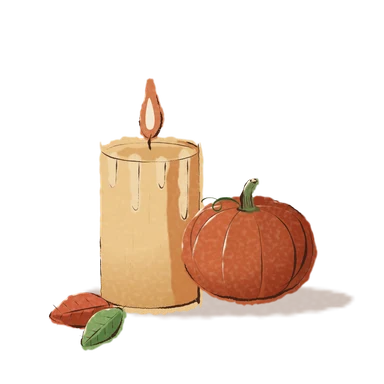
Put on a fall playlist, light a candle and make the pumpkins in a batch. They’re also a good way to get a little of the season into your space if you’re already decorating your room for fall. Make an extra one for a friend, and they will be ready to paint by the weekend.
Questions
What kind of clay is best for clay pumpkins?
Air-dry clay is the easiest, because it needs no oven and hardens by itself. Polymer clay also works and gives a smoother, sturdier finish, but you have to bake it following the temperature on the packet.
How long does air-dry clay take to dry?
Small pumpkins are usually dry to the touch after a day and fully dry in two to three days, depending on thickness and how humid your room is. Check the packet, and turn them over once so the bottoms dry too.
Why did my clay pumpkins crack?
Cracks come from clay drying too fast or too unevenly, or from clay that was too dry when you shaped it. Keep your hands slightly damp while you work, smooth any cracks with a fingertip of water, and let the pumpkins dry away from heaters and direct sun.
Can I eat food off clay pumpkins or use them as bowls?
No. Air-dry and polymer clay are for decoration only and aren't food safe, even when sealed. Keep them as ornaments, place settings or shelf decor.
How do I make clay pumpkins look like real ones?
Press ridges from top to bottom, make each pumpkin slightly wider than it is tall, and give each a different shape and size. Paint in a few shades of orange, then dab a darker colour into the ridges and wipe the raised parts clean.
Did it? Keep a stamp for it.In the Seasons app, you mark an idea done and it lands in your fall passport. Seasons opens on mobile in November.
Join the waitlist