A fall idea
Paint fall leaves in watercolour
an evening · cozy inside · under $20 · Updated
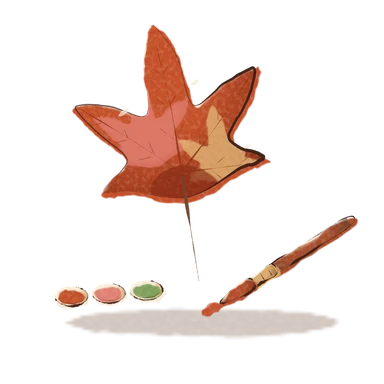
Pick up a few leaves and paint them loose and wet, letting the colours bleed into each other. They don't have to look real.
- Time
- an evening
- Where
- cozy inside
- Who
- solo-friendly
- Cost
- under $20
What you need
- Watercolour paints and a brush
- Watercolour paper
- A few leaves to paint from
Watercolour is a good medium for fall leaves, because the colours blend on their own and the edges go soft in a way that looks like autumn. You don’t need to draw well. The point is to be loose, wet and a bit careless, and let the paint do most of the work. A small set of paints, a brush and one piece of paper is enough for an evening.
What you need beyond the list
- A jar of clean water, and a second for rinsing if you can.
- A paper towel or an old cloth to blot the brush.
- A pencil and a rubber, for a light outline.
- Masking tape, to hold the paper flat to a board or the table.
- A palette: a plate or a plastic lid works.
Choose paper marked for watercolour. Thicker paper, around 140 lb or 300 gsm, stays flatter when wet. Paper that’s too thin buckles, and printer paper can pill.
A set of student-grade pans is fine for a first try, and usually costs under $20. A round brush, medium size, with a good point is the most useful.
Find your leaves
Pick up a few leaves in different shapes and colours: maple, oak, birch, ginkgo. Press them flat under a heavy book for a day if they’re curling, or press them properly. Look at the colours. Most fall leaves aren’t one colour: a leaf might go from green to yellow to orange to red, with brown at the edges.
Step by step: wet on wet
- Tape the paper down at the edges. This keeps it from buckling and leaves a clean white border.
- Sketch lightly. Draw the outline of a leaf in pencil. Press softly, because pencil lines can show through light paint.
- Wet the leaf shape with clean water and a brush, up to the edges. The paper should look shiny, not puddled.
- Add the lightest colour first. Touch yellow into the wet area.
- Add orange and red. Drop them in near the edges or the middle and let them bleed into the yellow.
- Add a touch of brown or a deeper red at one edge or near the stem for shadow.
- Leave it alone. Resist fussing. The colours keep moving for a minute or so.
- Let it dry completely. It will look lighter once dry.
- Add the veins. When the paint is dry, use a fine brush and a darker colour to paint the stem and the central vein, with a few lines branching off.
Try some variations
- Salt. Sprinkle a few grains of salt onto wet paint. It pushes the pigment away and leaves a speckled texture. Brush it off when dry.
- A branch of leaves. Paint a thin brown line and add small leaves along it, each in a slightly different colour.
- A leaf wreath. Paint ten or twelve leaves in a circle.
- One leaf per card. Paint small leaves on folded paper, and write a note inside.
- Dry brush. Use less water for rougher veins or edges.
- Blow the paint. Use a straw to blow a drop of paint into branching lines, for veins.
Common mistakes
- Muddy colours. You’ve mixed too many colours, or too much. Use two or three colours per leaf, and rinse the brush.
- Paper buckles. The paper is too thin or too wet. Use thicker paper, tape it down, and use less water.
- Hard edges where you didn’t want them. You painted onto paper that had started to dry. Keep a wet edge and work quickly.
- Colours too pale. Watercolour dries lighter. Use more paint and less water.
- Over-working it. Stop when you like it. More layers make it darker and flatter.
- Comparing it to a photograph. It isn’t supposed to look real. Loose and a little wrong is the style.
What to do with them
Cut the leaves out and stick them on a card, or leave the border and frame them in a cheap frame. A few small paintings in a row look better than one big one. You can also pin them on a wall, or give one to a friend with a note. If you want to practise, paint the same leaf three times, and you’ll see how much looser you get by the third.
Keep your paints and brushes dry after you’ve used them, and rinse brushes in clean water, then reshape the tip.
Make it a fall evening
Take the leaves from a walk and paint them the same night while the colours are still fresh in your mind. Put on music, light a candle you made, and paint until the light goes. If you’d rather not paint alone, bring a friend for a craft night and share the paints.
Questions
What paper is best for watercolour leaves?
Use paper made for watercolour, not printer or sketchbook paper. It absorbs water without buckling too much. Thicker paper, often sold as 140 lb or 300 gsm, handles wet paint best.
What colours do I need to paint fall leaves?
A yellow, an orange, a red and a brown are enough, and a green if you like. You can mix new colours from them. Beginner sets usually include all of these.
How do I get the colours to blend?
Wet the leaf shape with clean water first, then touch in yellow, orange and red while it's still wet. The colours bleed into each other on their own. Tilt the paper gently if you want them to move.
Why is my watercolour painting muddy?
Usually too many colours mixed together, or painting over a layer that isn't dry yet. Use fewer colours, and let each layer dry before adding more. Rinse the brush between colours.
Do I need to be good at drawing to paint leaves?
No. Leaves are forgiving because no two look alike, and loose, blurry edges look natural. Paint from a real leaf and don't worry about copying it exactly.
Did it? Keep a stamp for it.In the Seasons app, you mark an idea done and it lands in your fall passport. Seasons opens on mobile in November.
Join the waitlist