A fall idea
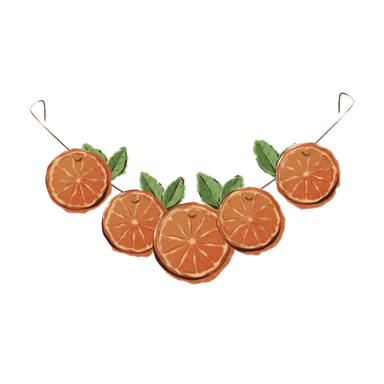
Make a dried-orange garland
an evening · cozy inside · under $20 · Updated
Slice oranges thin and bake them low, around 200°F (95°C), for a few hours until dry, then thread them on string. They glow when the light comes through.
- Time
- an evening
- Where
- cozy inside
- Who
- solo-friendly
- Cost
- under $20
What you need
- 3 or 4 oranges
- Baking sheets and parchment
- String and a big needle
A dried-orange garland is a small, cheap project that looks like it took longer than it did. Thin orange slices dry in a low oven into glowing, stained-glass rounds, and when you hang them near a window the light comes straight through. Most of the work is waiting while the oven does its job. It’s a good way to use an evening, and the kitchen smells of oranges the whole time.
What you need beyond the list
- A sharp knife, or a mandoline if you have one, for even slices.
- Paper towels, to blot the slices.
- A wire rack on top of your baking sheet is useful but not essential. It lets air reach both sides.
- Scissors.
- Optional: wooden beads, cinnamon sticks or dried bay leaves to thread in between.
Pick your oranges
Navel oranges are easy to slice and have few seeds. Blood oranges give you deep red slices, and they’re lovely in a mix. Choose firm oranges with smooth skin. Give them a quick rinse and dry first.
Slice and dry
- Heat the oven to around 200°F (95°C). If your oven’s lowest setting is a little higher, use it and watch more closely.
- Slice the oranges crosswise into rounds about a quarter inch (6 mm) thick, or a little thinner. Even slices dry at the same speed.
- Blot each slice between paper towels. Taking off the surface juice shortens the drying time.
- Lay them out on baking sheets lined with parchment, or on a wire rack over a sheet. Don’t let them overlap.
- Bake for a few hours, turning the slices over about halfway. Check them regularly in the last hour.
- Take them out when the edges are dry and the middles are no longer wet. They’ll feel slightly tacky and then firm up as they cool.
- Cool them completely on the rack before threading.
The time varies. Smaller or thinner slices might be done in two hours, and thick juicy ones can take four or more. Don’t try to rush them with a hotter oven, because the sugar in the juice scorches and the slices turn brown and bitter.
Make the garland
- Cut a length of string. Measure the space you’re going to hang it in, then add some extra for knots and the ends.
- Thread the string through the eye of a big needle.
- Push the needle through each slice near the edge, or through the peel, and pull the string through.
- Tie a knot below each slice to hold it in place, or add a bead on either side. This keeps the slices evenly spaced.
- Leave a loop at each end so you can hang it from a hook or nail.
If a slice is brittle, make the hole a little further in from the edge so it doesn’t crack. Twine and baker’s string both look good. Thin ribbon works too.
Mistakes to watch for
- Slices are sticky or soft after cooling. They need more time. Put them back in for another half hour, then check again.
- Edges are dark brown or burnt. The oven was too hot, or they were left too long. Lower the heat next time and check earlier.
- Mould appears after a few days. The slices weren’t dry enough, or the room is damp. Throw them away and dry the next batch for longer.
- Slices curl. That’s normal as they dry. A cooling rack helps, and some curl looks nice anyway.
- The slices tear when you thread them. Make the hole a bit further from the edge, or use a thicker needle.
Stay home while the oven is on, even at low heat, and check on the slices regularly. They’re not for eating.
How to use and keep it
Hang the garland over a window, along a mantel, on a shelf, or on a tree if you put up one for the winter. They look best where the light passes through them. Keep them out of steamy rooms like the kitchen or bathroom, because moisture brings them back to soft and mouldy.
You can also use the same slices without string. Put them in a bowl with pinecones, tuck them into a fall wreath, or tie one to a gift. When the garland starts to fade or smell musty, compost it and make another.
Make it a fall evening
Slice the oranges after dinner, get the first tray into the oven, then spend the waiting time on something else in the kitchen: a simmer pot using the leftover peel, some tea, a film on a laptop. When the slices cool, thread them while you chat or listen to music. You’ll have something to hang before you go to bed.
Questions
How long does it take to dry orange slices in the oven?
Usually a few hours at around 200°F (95°C), turning the slices halfway. The exact time depends on how thick they are and how juicy the oranges are. They're done when they feel dry at the edges and only slightly soft in the middle, and they firm up as they cool.
How thin should I slice oranges for a garland?
About a quarter of an inch (6 mm), or a little thinner. Thicker slices stay wet in the middle and can go mouldy. Very thin slices dry quickly but can tear when you thread them.
How do I hang dried orange slices on a string?
Use a big needle and thread the string through the slice, close to one edge, or through the peel. Tie a knot below each slice, or space them with beads, so they don't slide together. A needle with a large eye makes it easier.
How long do dried orange garlands last?
Properly dried slices can last through the season and often longer, as long as they stay dry. Keep them away from damp rooms and steamy kitchens. If they go soft, smell musty or show mould, throw them away.
Can I dry oranges without an oven?
Yes, but it's slower. You can leave slices on a rack in a warm, dry place or near a radiator for several days, turning them now and then. An oven at low heat is more reliable, especially when the air is damp.
Did it? Keep a stamp for it.In the Seasons app, you mark an idea done and it lands in your fall passport. Seasons opens on mobile in November.
Join the waitlist