A fall idea
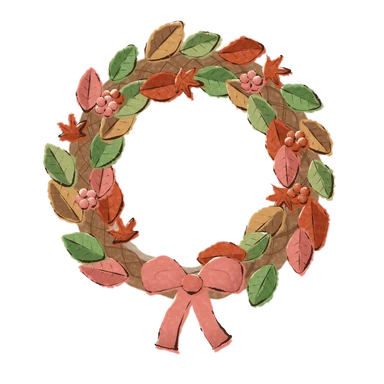
Make a fall wreath
an evening · cozy inside · under $20 · Updated
Start with a plain grapevine wreath from a craft store and tuck in whatever you find: dried leaves, eucalyptus, wheat, pinecones. Hot glue holds the rest.
- Time
- an evening
- Where
- cozy inside
- Who
- solo-friendly
- Cost
- under $20
What you need
- A grapevine wreath base
- Dried leaves, branches and pinecones
- A hot glue gun
A fall wreath doesn’t need to be neat or symmetrical. The grapevine base already looks good, and you only need to add enough to make it yours. It’s a project for one evening, with a glue gun, a pile of dried things and a bit of music on. When you’ve finished you’ll have something to put on the door or the wall that you made yourself.
What you need beyond the list
- Floral wire or thin craft wire, for anything too heavy to glue.
- Wire cutters or old scissors.
- A piece of ribbon, for hanging or for a bow.
- A large sheet of paper or cardboard to protect the table from glue.
- A small bowl of cold water next to the glue gun, in case you get burned.
Grapevine wreath bases come in several sizes. Around 12 to 16 inches is a good size for a door. Smaller is easier for a first one.
Gather your materials
You can use things you buy, or things you find.
- Leaves. Dried or faux fall leaves, or real ones you’ve pressed flat. Real leaves go brittle, so handle them gently.
- Greenery. Eucalyptus, dried or preserved, is soft and pale and goes well with warm colours.
- Wheat, grasses and seed heads. They add height and a lighter texture.
- Pinecones. Bake them first at a low heat to remove any bugs.
- Berries, small mini pumpkins, or cinnamon sticks. Small accents that draw the eye.
- Ribbon. A neutral or rust-coloured ribbon is enough.
Plan before you glue
This is the step that makes a wreath look good. Lay the base flat and arrange everything on top before you attach anything.
- Pick a focal point. Many wreaths cluster the decoration on one side, usually the bottom left or right, and leave the rest of the vine bare.
- Put the biggest pieces down first: pinecones, a bunch of wheat, a couple of large leaves.
- Fill in with smaller pieces, tucking stems in the same direction, so the wreath looks as if it’s growing around the circle.
- Use odd numbers of things, like three pinecones or five berries. Groups of three or five tend to look more natural than pairs.
- Take a photo, step back and move things around until it looks right.
Attach everything
- Heat the glue gun. Hot glue is hot enough to burn, so keep your fingers away from the nozzle and the glue.
- Take one piece at a time. Put a dab of glue on the end of the stem or the back, press it between the vines, and hold for a few seconds.
- Work from the biggest pieces to the smallest.
- For heavy things like pinecones, wrap floral wire around the base and twist the ends through the vines on the back.
- Add a bow last, if you want one.
- Trim any stems that stick out at the back.
Wait for the glue to cool before you move the wreath. Pull off any glue strings with your fingers once they’ve set.
Mistakes to avoid
- Too much on it. The wreath can look crowded. Leaving some bare vine makes the rest stand out.
- Everything the same size. Mix big, medium and small pieces.
- Everything pointing different ways. Follow the circle so things flow around it.
- Glue showing. Tuck the glue spot behind a leaf or stem.
- Heavy things falling off. Use wire as well as glue.
- Colours that don’t go together. Keep to three or four colours. Rust, cream, gold and green is a safe mix.
Hanging and keeping it
Tie a loop of ribbon or wire around the top of the wreath at the back, where the vines cross. Hang it from a nail, a hook or over the door. Keep it out of direct sun and rain if you can, because both fade and soften the dried materials. Indoors, it’ll last the whole season.
At the end of the season, put it in a box with a bit of tissue paper and store it somewhere dry. You can add something new next year.
Make it a fall evening
Ask a friend over and make two wreaths at the table, sharing the glue gun and the pinecones. It also fits into a craft night, or an afternoon after a walk where you pick up a few things to add. Hang it before the weekend, and the front door will look like fall by Monday.
Questions
What do I need to make a fall wreath?
A grapevine wreath base, a hot glue gun and something to decorate with: dried leaves, eucalyptus, wheat, pinecones, berries or small pumpkins. Floral wire, scissors and ribbon are useful extras. A craft shop sells all of it.
How do I attach things to a grapevine wreath?
Hot glue works for most things. Add a dab to the stem, tuck it between the vines and hold it for a few seconds. For heavier items like pinecones, wrap a piece of floral wire around them and twist it through the vines.
Can a fall wreath go outside?
Yes, if it's sheltered, such as under a porch roof or on a door that doesn't get rain. Dried materials can fade in strong sun and go soft in wet weather. For a front door in an exposed spot, use things that cope better with weather, like pinecones, or hang it indoors.
How do I hang a wreath on a door?
Tie a loop of ribbon or wire to the back of the wreath, then hang it on a hook. An over-the-door wreath hanger works on most doors and doesn't need nails. Add a small piece of felt or cloth behind it to protect the paint.
How long does a dried wreath last?
Indoors and out of direct sun, it can look good for the whole season and often longer. You can store it in a box over winter and bring it out next year. Dust it gently with a soft brush.
Did it? Keep a stamp for it.In the Seasons app, you mark an idea done and it lands in your fall passport. Seasons opens on mobile in November.
Join the waitlist